
I recently tried a few project management and issue tracking applications and found YouTrack by Jetbrains to be an excitingly fresh take on the matter and with a lot of possibilities to customize the experience. And the best part of it: you can host it on your own server and it’s free for up to 10 users. You can find more details about all features on the website but trying it might be much better than screenshots.
As I run several private tools on my Synology Diskstation DS918+ I decided to give YouTrack a try, and install it. The documentation has a very detailed guide on how to set it up with Docker in general. If you have any problems I ask you to consult the docs first, you might have missed something.
Before we start, you must have the Docker package installed on your Diskstation and there should be at least 1.5Gb of RAM available. I know, this is a lot but most of the newer Diskstations come with at least 2GB, and they are easily upgradable. I only paid 40€ for 4GB of additional RAM.
Getting started with Docker on the Diskstation
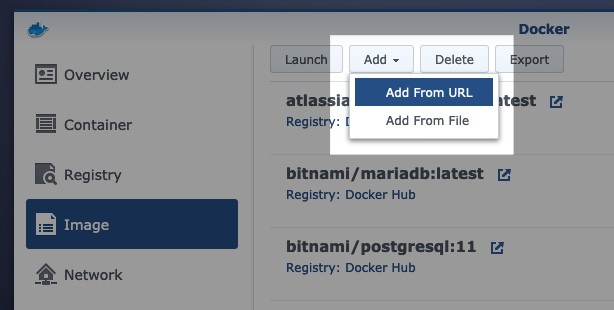
To be able to run YouTrack on your Diskstation, you have to pull the image from the Docker Hub. Open the Docker app on your Diskstation admin interface and select “Image” from the sidebar. Then choose “Add From URL” in the “Add” dropdown menu.
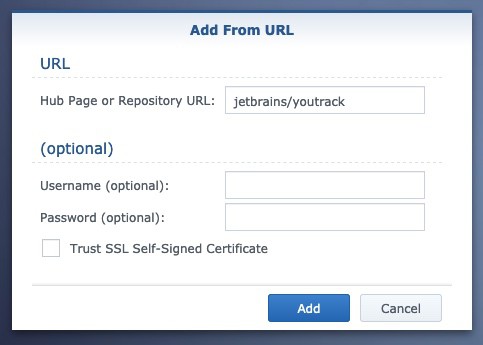
In the following window, enter “jetbrains/youtrack” in the URL field and press Add.
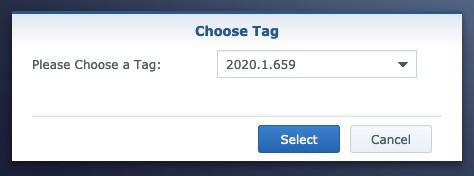
After some seconds the Diskstation will present you another window that lets you select the actual version of the image. I advise you to always download a specific version and not “latest”. In our case, scroll down and select the latest “2020.1” version.
After that the Diskstation will download the image. Once the download is finished the new image is available on the “Image” overview:

Creating a new YouTrack container
There are two ways of setting up the YouTrack Docker container on Synology Diskstations:
- manually create the container and configure it on your own, or
- import a prepared configuration file.
I cover both examples in the following steps.
Manually creating a YouTrack container
To create a new container, double click on the YouTrack image in the image list. This will open the creation wizard. Choose a name for the container and click “Advanced Settings”.

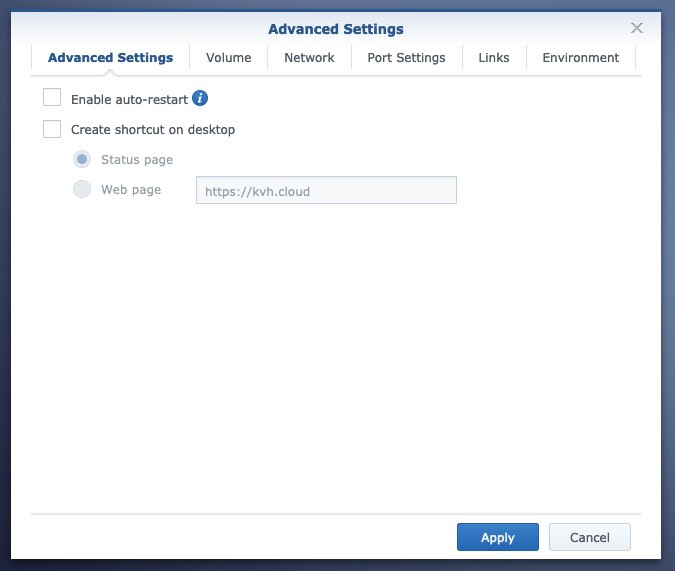
In the advanced settings we need to configure some options to be able to run YouTrack correctly. I do not recommend enabling auto restart for now to prevent issues when the container is not able to start for some reason.
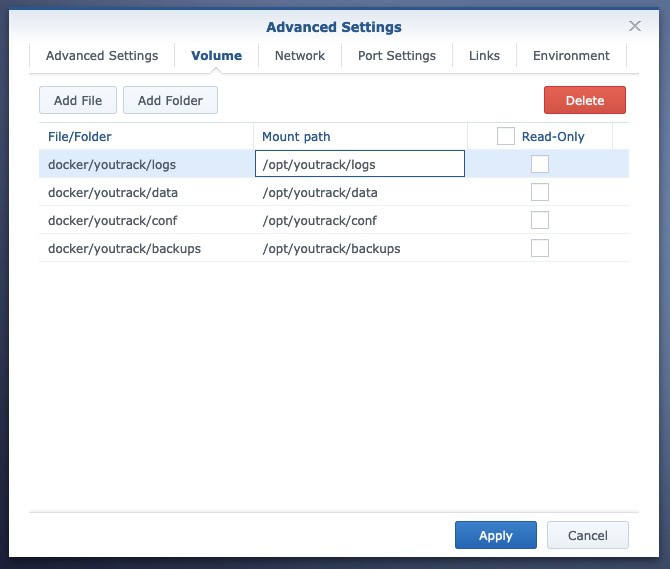
Switch to the “Volumes” tab in the advanced settings now. You will need to have folder containing several subfolders where YouTrack data is stored. This is very important! If you do not sync the data from the container to your Diskstation you will lose data. I created a new shared folder for Docker containers but you can choose any other location. Add the following folders and their container counterparts to the volumes list:
| Local folder | Container folder |
|---|---|
| /diskstaion-folder/youtrack/backups | /opt/youtrack/backups |
| /diskstaion-folder/youtrack/conf | /opt/youtrack/conf |
| /diskstaion-folder/youtrack/data | /opt/youtrack/data |
| /diskstaion-folder/youtrack/logs | /opt/youtrack/logs |
Once you’ve completed these steps, apply the settings and review the container configuration. You can leave the “Start container now” checkbox enabled. Jump to the “Setting up YouTrack on the Diskstation” section if your container started successfully.
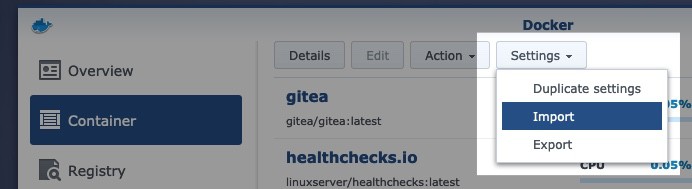
Creating a YouTrack container from the configuration file
Instead of manually creating the configuration for the container, you can import a configuration file and start the container right away.
Download youtrack-2020.1.json (.json, 2KB)
Customize the Docker configuration file
The configuration can be left as it is except for two important changes you may need to make.
Changing the network port
Change the network port to a value you would like to use. The standard is 8080 but this may cause conflicts with existing apps: "host_port" : 8080,
Create and set shared folders
You will need to have folder containing several subfolders where YouTrack data is stored. This is very important! If you do not sync the data from the container to your Diskstation you will loose data. Change the host_volume_file settings for all four folder to values you would like to use: "host_volume_file" : "/your-diskstation-folder/youtrack/logs",
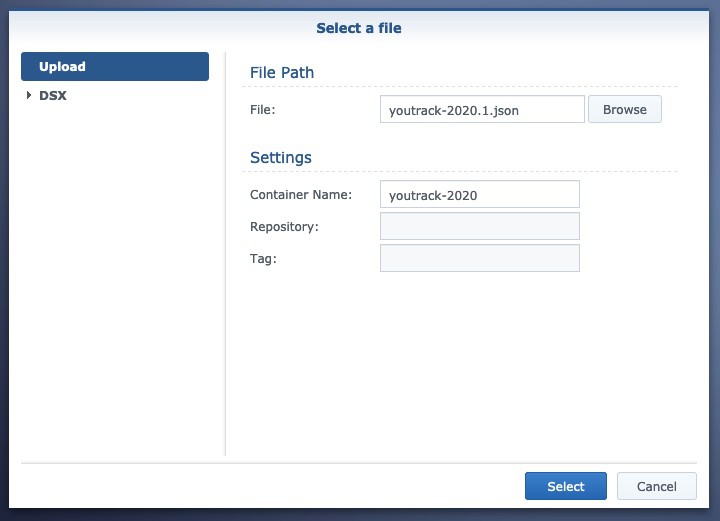
Importing the configuration file
Once you’ve customized the configuration, import it from the Docker container overview:
Select the configuration file, choose a name and finish the import via “Select”. The Diskstation will now create a container and add it to the overview. You can then start it.
A word on folder permission problems
In my case YouTrack wouldn’t start because if was not able to write to the synced folders. If you encounter the same issue, remove the synced folders and try it again. If YouTrack started successfully you can enable them again and Docker will sync the files from the container into your Diskstation folders.
Setting up YouTrack on the Diskstation
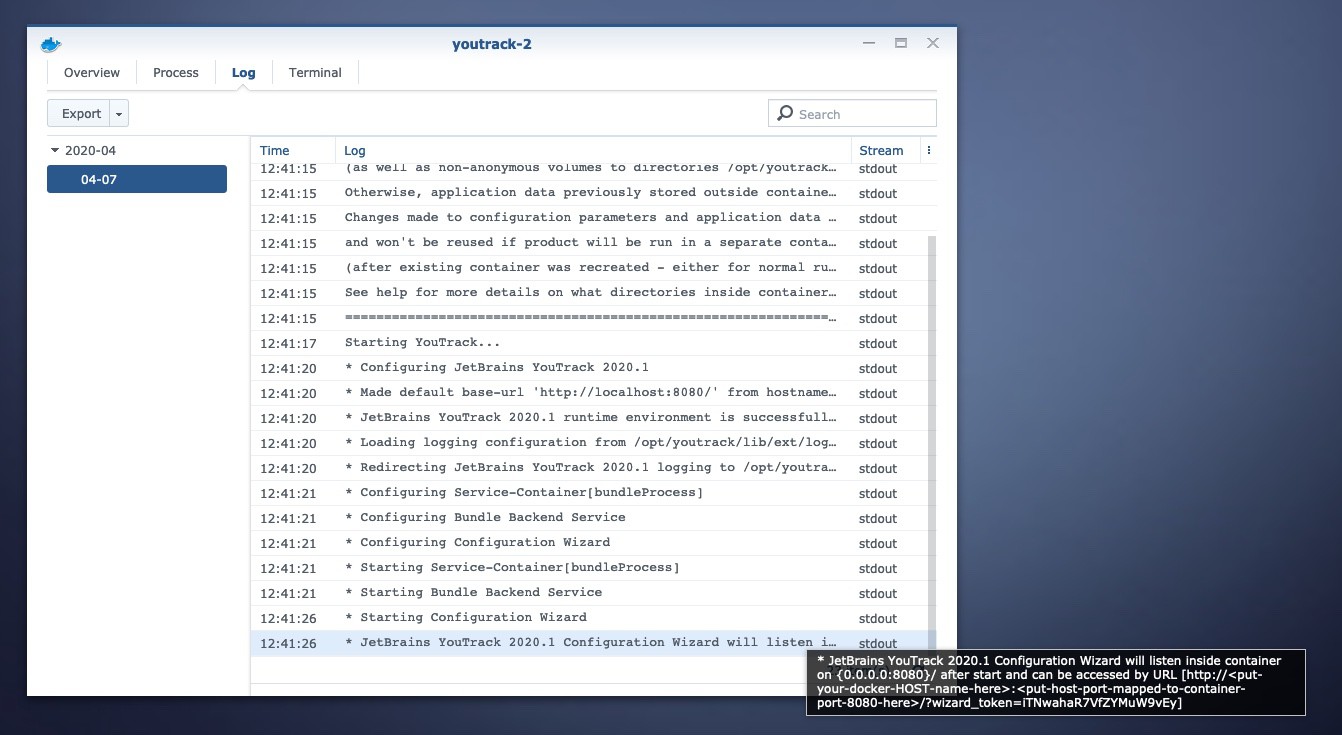
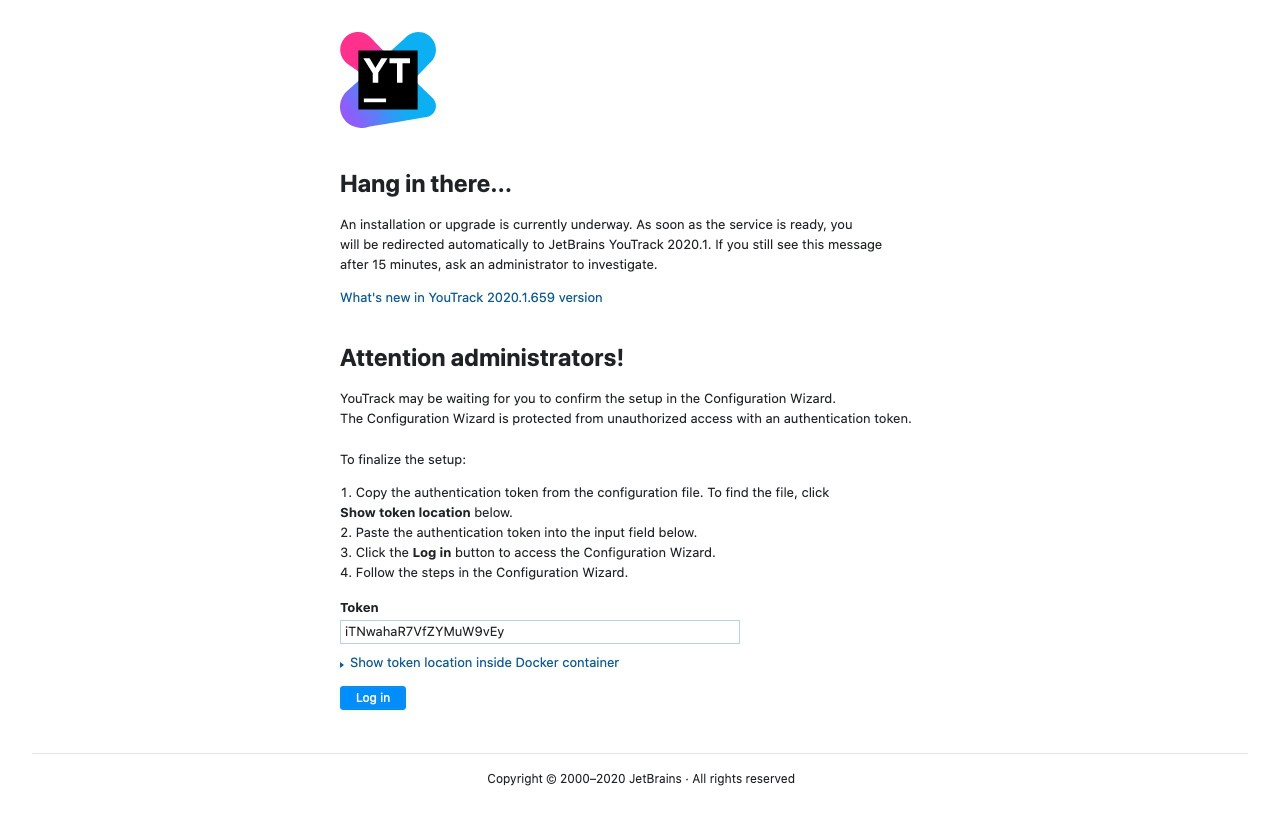
Once your container started successfully, you can continue with the YouTrack configuration. To be able to complete the YouTrack setup, we need a special token that can be found in the container logs. Double click the container and choose the “Logs” tab. Scroll all the way down to a message that starts with “Jetbrains YouTrack 2020.1 Configuration Wizard …”:
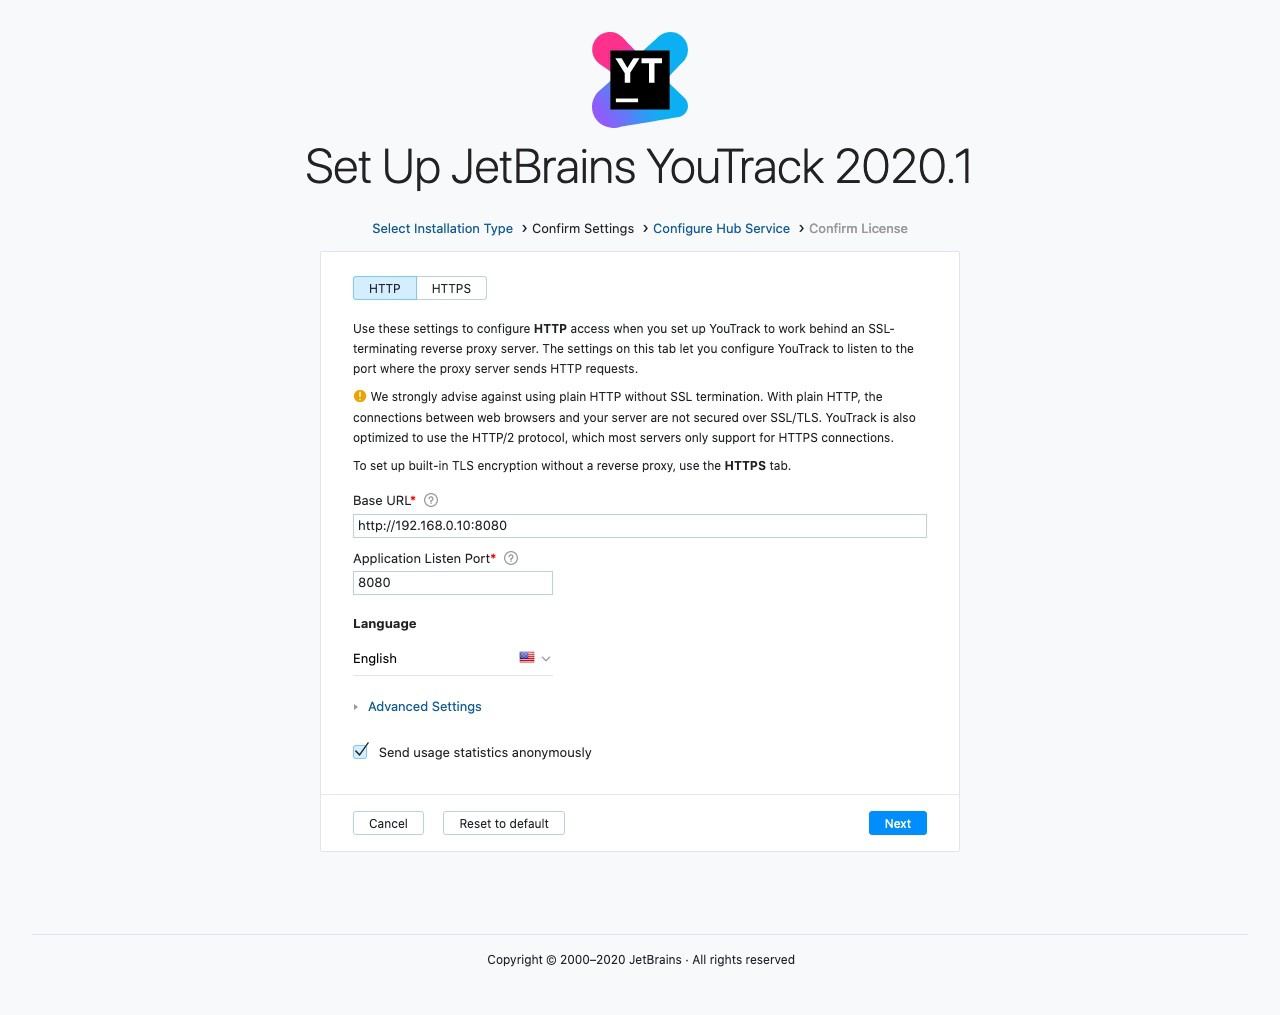
Now open the URL of the installation in your browser. If you didn’t set up a domain and a reverse proxy, the domain will consist of the IP of your Diskstation and the port you chose in the setup, e.g. http://192.168.0.10:8080. I recommend setting up a domain and a reverse proxy to be able to access your tasks and issues from everywhere.
The first screen will ask you for the mentioned security token. Enter the token from the logs and continue.
In the following screen YouTrack asks you about the connection settings. If you haven’t set up a domain already, now’s the right time to do so. I did not test changing the URL after the setup so be careful.
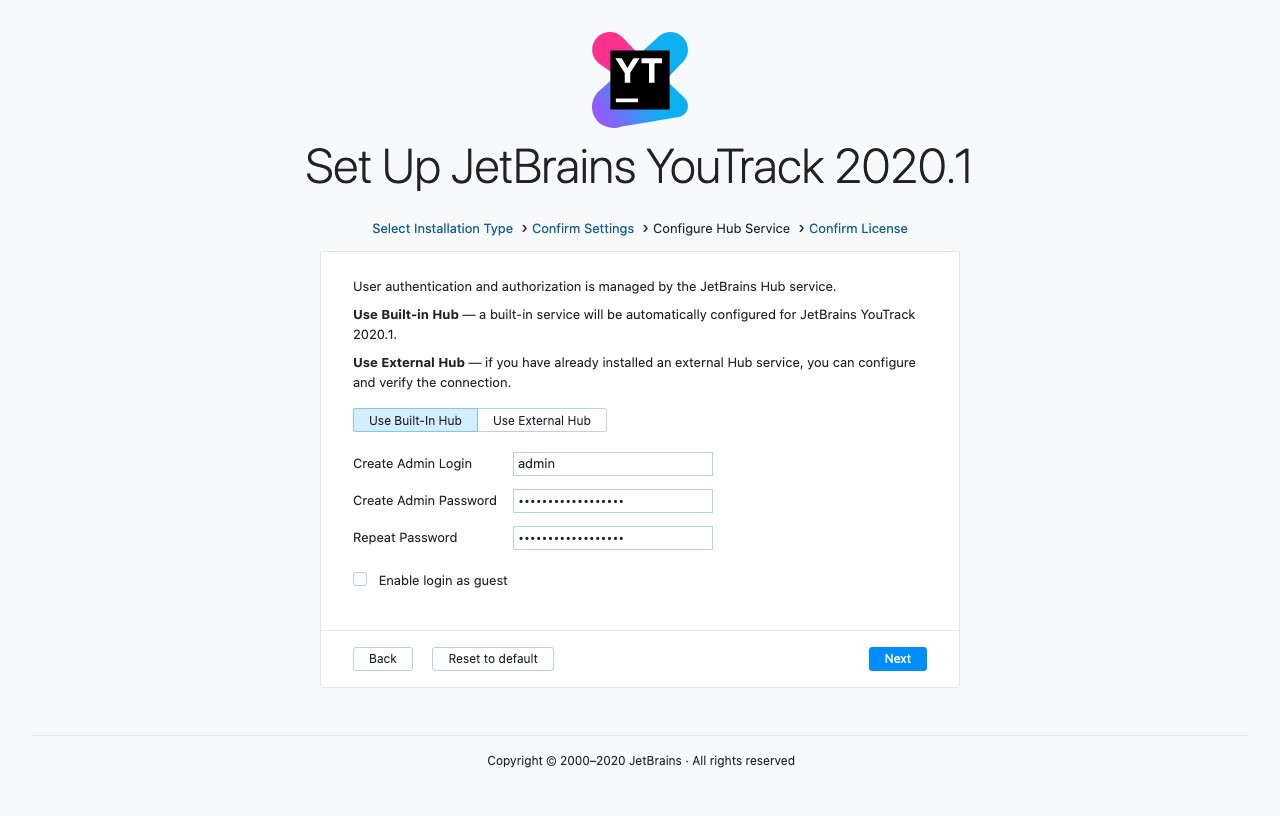
If you passed this screen, the rest is basically self-explaining. Create a new administrator account. You may want to uncheck the “Enable guest login” box to prevent other accessing your YouTrack.
The last screen asks you for a license. If you bought one, enter it here. Otherwise, just save and you are done.
Enabling database backups
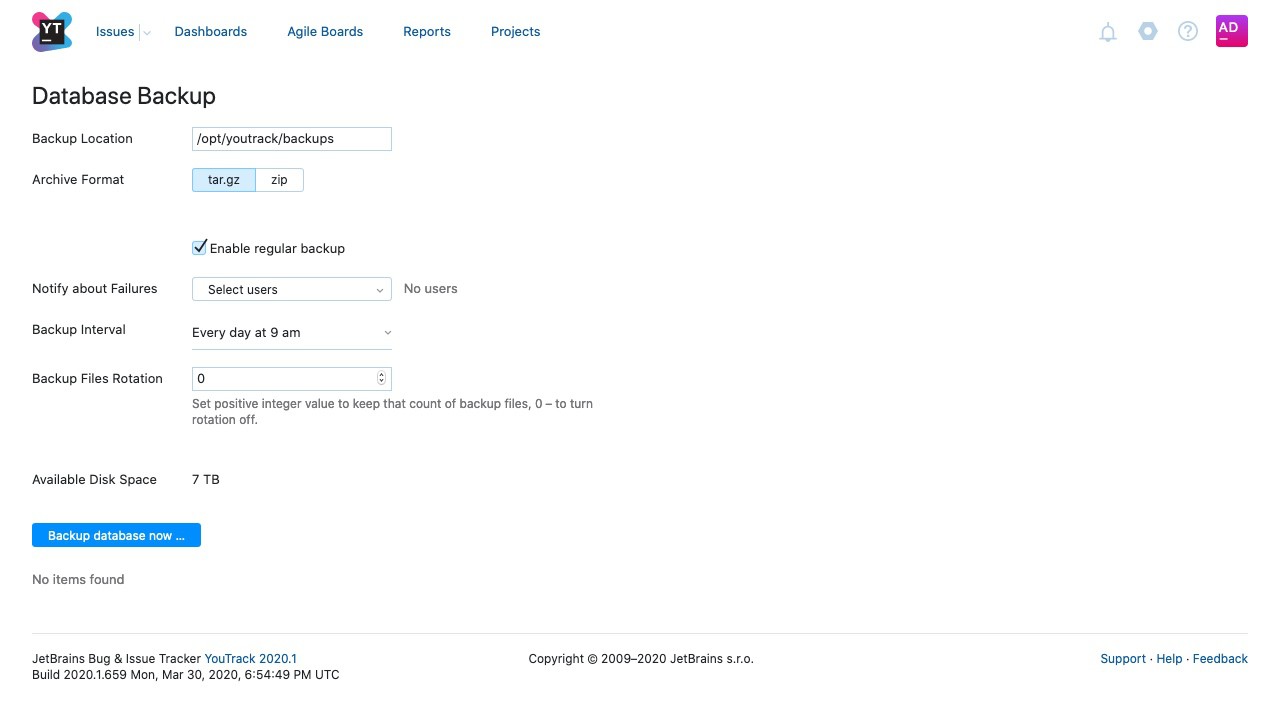
You are free to configure YouTrack however you want. The only very important thing to do right after starting with YouTrack is to enable regular database backups. As YouTrack ships with his own database, those backups will contain all important files. Select “Database Backups” in the administration dropdown besides your user avatar and enable the regular backups.
Leave the location as it is. Remember that we configured the Docker container to sync /opt/youtrack/backups with a Diskstation folder. The backups will be located there.
That’s it. You now have a fully working YouTrack at your hands.